 Skip to content




How to Use a Fountain Pen for the First Time: A Complete Beginner’s Guide
The first time you uncap a fountain pen, there is usually a small pause. Which way should the nib face? Do you press down? Does the cartridge go straight in, or do you have to open it? These are sensible questions. A fountain pen behaves differently from the ballpoint you have probably used for years, but the basics are much simpler than the unfamiliar parts suggest.
You do not need beautiful handwriting, expensive ink or a collection of accessories to begin. You need a suitable pen, the correct ink supply and paper that lets you see what the nib is doing. Once those three things work together, the rest comes through ordinary writing.
At Makoba, we would rather help you enjoy your first page than overwhelm you with terminology. Here is a practical way to get from a new pen in its box to comfortable everyday use, with explanations for the moments that tend to cause confusion.
Key highlights before your first fill
- Hold the pen with the top of the nib facing upwards and write with light pressure.
- Identify the filling system before opening or turning anything.
- Use ink explicitly intended for fountain pens and check cartridge compatibility.
- Give a freshly installed cartridge time to supply the feed.
- Cap the pen between writing sessions and keep the first ink choice simple.

Get to know the parts you will actually use
The nib is the metal writing tip. Its slit helps guide ink towards the point that touches the paper. Underneath sits the feed, usually a dark component that manages the ink supply. Together they deliver ink without the downward pressure associated with many ballpoints.
The section is the part you hold. The barrel forms the main body, while the cap protects the nib when the pen is not in use. Inside a cartridge/converter pen, the ink supply connects to the back of the section. With a built-in filling system, ink is stored within the body instead.
You do not need to remove a nib or feed to learn how to write. Leave those components in place. For your first session, the useful distinction is between the part you open to reach the ink supply and the parts intended to remain assembled.
Start with the instructions for your actual model
A demonstration for a different pen can be misleading. A cap may pull off or unscrew; a converter may press into place or attach differently. A rear knob might operate a filling mechanism rather than simply close the barrel.
Read the supplied instructions before testing the pen's construction through trial and error. If a component does not move with normal gentle handling, stop and check. The correct operation usually feels straightforward once you know which action is intended.
Choose a manageable first pen
A comfortable grip and an appropriate nib matter more than an impressive specification. A lightweight body may suit someone who writes pages at a time. A metal body may appeal to someone who likes a more substantial feel. Neither material is inherently the correct starting point for everyone.
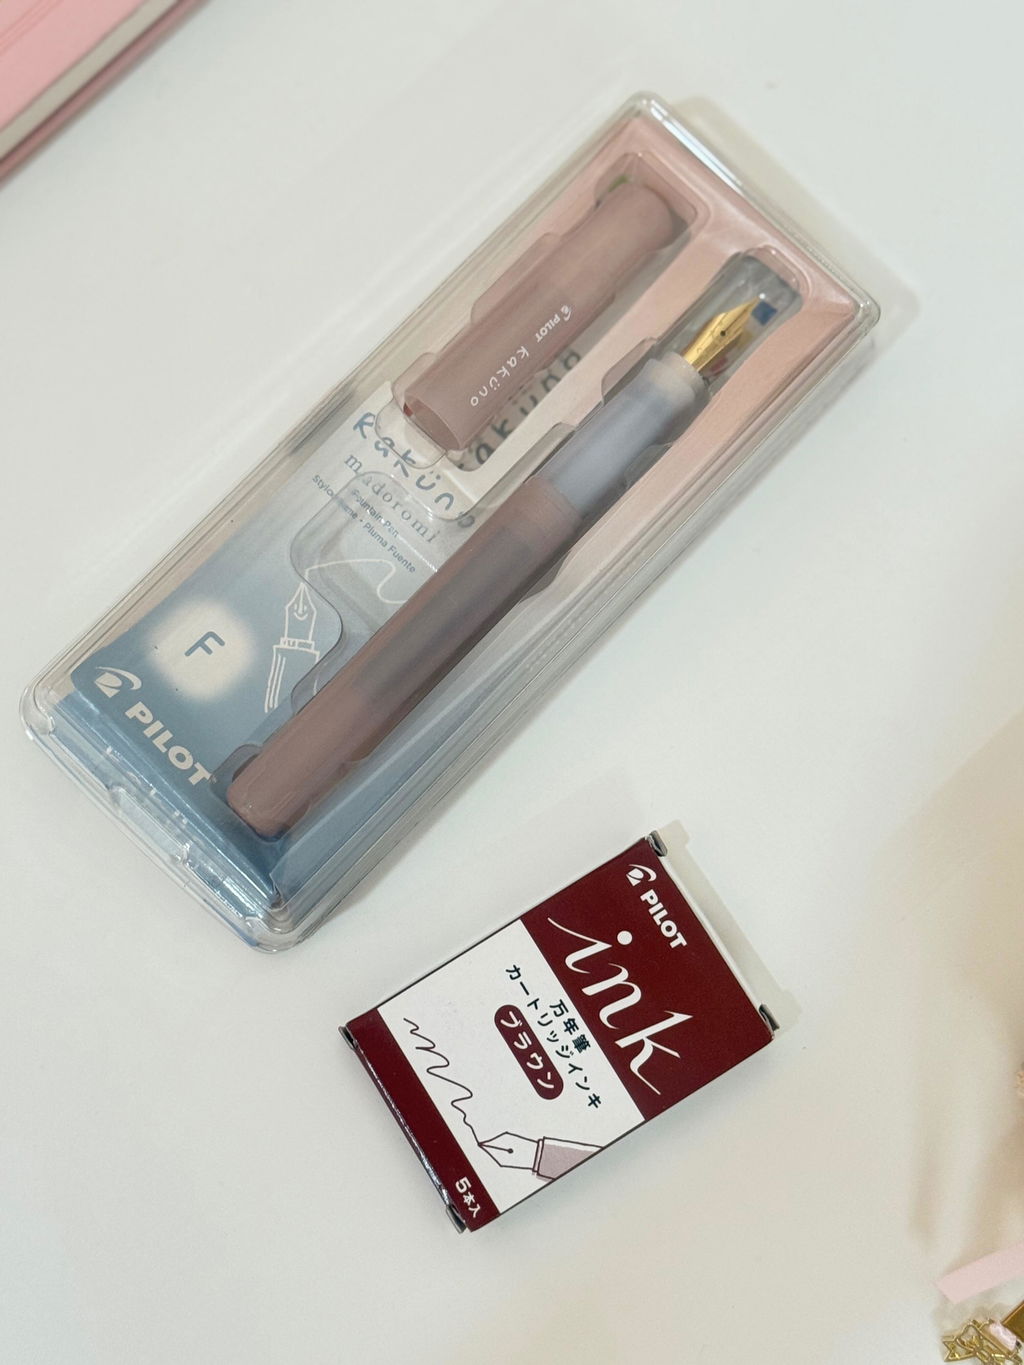
The Pilot Kakuno is a useful example of a lightweight introductory fountain pen. Its smile-marked steel nib offers a visible orientation cue. The LAMY Safari takes another approach with shaped grip surfaces. Try to choose the design that works with your natural hold.
If you are deciding between two introductory Pilots, our Kakuno versus Metropolitan comparison explains the practical trade-offs. Current finishes, nibs and availability should be checked on the product listings rather than assumed from the model name.
Identify how your pen takes ink
There are three useful categories for a beginner. A cartridge is a sealed, prefilled container that connects inside a compatible pen. A converter is a reusable filling device that occupies a similar position but draws ink from a bottle. A built-in reservoir is filled using the mechanism incorporated into the pen.
That last category includes piston and vacuum systems, which operate differently. You do not need to master every system before starting. Learn the one in your pen and leave the others until they become relevant.
Our guide to fountain pen filling systems covers the wider picture. For the first fill, avoid combining instructions from several mechanisms into one improvised process.
Installing an ink cartridge
Open the barrel as directed and identify the cartridge's connecting end. Use the exact cartridge type recommended for the pen. Similar-looking containers are not necessarily interchangeable, and a cartridge that fits inside the barrel may still have the wrong connection.
Seat the cartridge according to the instructions, using controlled pressure at the intended connection. Do not cut the seal with a blade, drill a hole or remove the nib to push from the other side. The pen's connector is designed to open the compatible cartridge as it is installed.
Reassemble the barrel, cap the pen and allow time for ink to reach the feed. Avoid repeatedly removing the cartridge to check progress. Each unnecessary interruption can make the process messier without helping the ink travel any faster.
Why the pen may not write immediately
An empty feed needs to become supplied with ink. A short wait after a new cartridge is normal; the exact time varies with the pen and conditions. Keep the pen in the position recommended by its maker, with the nib protected.
Do not interpret the delay as a request for more pressure on the paper. If the ink has not reached the tip, pressing harder will not solve the supply problem. Check cartridge seating, compatibility and the instructions before attempting anything else.
Some manufacturers describe a specific priming action. Follow that only where appropriate to your model. Random squeezing, shaking or tapping can send ink into the cap or onto your desk.
Filling a converter from bottled ink
A converter must be compatible with the pen and properly attached. With the mechanism prepared as instructed, immerse the nib to the required depth and operate the converter slowly to draw ink. The necessary depth generally includes the feed's intake area, not merely the very tip.
Lift the pen carefully and wipe the section using a soft, suitable cloth or tissue without catching the nib. Keep the bottle upright on a stable surface. A small washable tray can make the first attempt feel less precarious, especially beside a laptop or important paperwork.
Do not chase a completely bubble-free fill through increasingly forceful actions. Some air space can be normal. The useful result is a properly filled, cleanly handled pen that writes, rather than a perfect-looking reservoir achieved through unnecessary fiddling.
Buy the converter for the model, not just the brand
Manufacturers can offer several converters, and barrel clearance matters as well as the connection. A part designed for one model may be too long or otherwise unsuitable for another.
For example, LAMY specifies the Z28 for models including Safari and Joy. That does not make it a universal LAMY filling device, much less a universal converter for other manufacturers. Confirm the exact pairing before buying.
Our cartridge and converter compatibility guide explains how to identify the correct supply. A few minutes checking the model can prevent a frustrating first session.
What if your pen has a piston filler?
A piston pen draws ink directly into its reservoir through a built-in mechanism. The rear control is used as instructed to move the piston and fill from a bottle. It does not take a cartridge simply because the barrel looks large enough to hold one.
The TWSBI ECO is a familiar example. Learn the filling direction, immersion depth and stopping points from its instructions. Keep movements gentle and never force the mechanism past its intended travel.
For a beginner, the main adjustment is filling at a desk instead of inserting a cartridge. A visible reservoir can make ink monitoring enjoyable, but it is still important to distinguish ordinary filling from maintenance or disassembly.
Holding the pen: lighter than you think
Place the section comfortably between your fingers, with the upper face of the nib visible. Let the tip rest on the paper rather than pressing it down. The nib needs appropriate contact, not force.
Many writers begin at a moderate angle to the page, then adjust until the pen moves naturally. There is no single angle that suits every hand and nib. If you normally hold a ballpoint almost vertically, a slightly lower position may help you find more consistent contact.
Avoid tightly gripping the pen to control the unfamiliar tip. Relax your fingers, write slowly enough to notice what is happening and adjust one thing at a time. A fountain pen should not require your knuckles to turn white.
Keep both sides of the tip on the page
Unintentional rotation is a common early difficulty. When the nib rolls onto one side, the ink supply at the tip may become inconsistent and the contact can feel less comfortable.
Look at the nib's top while writing a few letters. If it gradually turns away from you, return to a neutral orientation. A shaped grip may help some users notice the position, although it should not force you into an uncomfortable hold.
The goal is not a rigid posture. It is a relaxed grip that allows the writing surface of the tip to meet the paper consistently.
Make your first page a useful experiment
Write the date, the pen model and the ink you used. Add a few lines of normal handwriting, a shopping list and some numbers. This tells you more about daily suitability than repeatedly drawing large loops or pressing down to see how much the nib bends.
Try your usual letter size first. Notice whether the line feels too wide for the ruling or too fine for your preference. Then slow down briefly and observe whether the pen writes more consistently when your grip relaxes.
Keep this page. It becomes a reference when you later change paper or ink. Without it, it is easy to attribute every difference to the pen even though several parts of the setup have changed.

Pick paper that gives the pen a fair chance
Ordinary paper can absorb fountain pen ink quickly, making the line look wider or fuzzy. That does not necessarily mean the nib is faulty. A suitable notebook makes it easier to understand how the pen normally behaves.
Browse our fountain pen friendly notebooks and choose a format you will actually carry and use. A large desk notebook is not automatically better than a compact one. The useful combination fits both the ink and your routine.
Paper weight alone does not establish performance. Surface treatment and absorbency also matter. Our GSM, bleed and feathering guide explains why heavier paper is not a universal solution.
Keep the first ink choice uncomplicated
Choose a conventional fountain pen ink in a colour you enjoy reading. Blue, black and blue-black are practical starting points, but the colour is your choice. The important part is that the formula is intended for the pen.
Do not use drawing ink, printer ink or an unidentified liquid simply because it is called ink. Some calligraphy products contain binders that are inappropriate for fountain pen feeds. Product compatibility should be explicit.
Our bottled ink range offers room to explore later. Begin with one reliable combination so you can recognise normal flow, drying and cleaning before introducing several unusual formulas.
Understand what the nib width means for you
An Extra Fine or Fine option can suit small handwriting, while a wider nib may be enjoyable for larger writing and visible ink colour. These are starting points rather than strict rules.
Nib labels are not exact measurements shared by every brand. Two Fine nibs can produce different results because of tipping, flow, ink and paper. If you already use a pen comfortably, tell us its model and width when asking for advice.
Our nib selection guide provides context. You do not need the broadest nib to enjoy a fountain pen, and a gold nib is not a requirement for beginning well.
Recognise normal feedback and genuine difficulty
A slight sensation of the tip moving over paper can be normal. It differs from a nib that catches, tears fibres or refuses to write in a particular direction. Paper texture also changes what you feel.
First check the simple variables: nib orientation, pressure, ink supply and paper. If the problem persists, ask for help rather than adjusting the metal yourself. A beginner should not need to grind a nib or spread its tines to get ordinary writing.
Our guide to feedback and scratchiness helps describe the difference. Accurate descriptions make it easier to identify the next useful step.
When the pen skips or stops
Check whether there is ink, whether the cartridge is properly seated and whether the nib is making consistent contact. With some mechanisms, an operating position must be set correctly for sustained writing. Refer to the specific instructions.
If the pen has dried after being left uncapped, follow the recommended cleaning or restarting routine. Avoid pushing harder or tapping the tip. Repeated force can turn an ink-supply issue into physical damage.
For a more detailed diagnosis, use our skipping and hard-starting guide. Keep a note of when the problem occurs, because a pen that stops after several lines presents a different clue from one that will not begin at all.
Cleaning without turning it into a repair job
Follow the maker's instructions for the pen and ink. Cleaning is particularly useful when changing colours, storing the pen or addressing dried residue. Gentle flushing is different from removing every internal part.
Use the cleaning liquid and temperature appropriate to the model. Avoid household solvents, hot water or ultrasonic cleaning unless the manufacturer specifically permits them. Finishes, seals and materials do not all respond in the same way.
Our fountain pen cleaning guide covers the basic routine. For your first pen, learning regular care is more valuable than collecting tools for unnecessary dismantling.
Build a small daily habit
Use the pen for one recurring task: a morning list, a few meeting notes or a short journal entry. Familiarity grows through normal writing, and a regular purpose makes the pen less likely to sit unused while ink dries inside it.
Cap it during breaks, carry it securely and avoid storing it loose with keys. Before leaving it unused for an extended period, clean and store it as directed. These are small habits rather than elaborate rituals.
Do not worry if your handwriting looks much the same on day one. A fountain pen offers a different writing experience; improvement in letterforms comes through attention and practice, not the purchase alone.
Three small exercises that teach useful habits
Write a list without changing pressure
Write ten ordinary items, such as things to take to work. Keep the pressure light from the first item to the last. Notice whether your hand starts squeezing when you think about the shape of a difficult letter. Pause, relax your fingers and continue rather than pushing through the tension.
This is not a handwriting competition. It helps you distinguish the pen's normal contact from the extra force you may be applying out of habit. The list also shows whether the chosen nib fits the size at which you naturally write.
Compare two papers with the same pen
Write the same short sentence on your usual paper and a suitable notebook page. Keep the ink and pen unchanged. Look at the edges, the apparent width and the reverse of the sheet after drying. If the result changes, you have learned something about paper without altering the nib.
Record the paper names if known. A quick comparison today can save confusion later when an office form behaves differently from your journal. The pen has not necessarily changed simply because the page looks different.
Practise a comfortable restart
Write two lines, cap the pen and put it down securely while you do another small task. Then uncap and begin a new sentence. Repeat a few times during normal use. This introduces the cap routine and helps you find the same comfortable grip again.
Do not leave the nib exposed deliberately to see how long it takes to dry. The exercise is about ordinary habits, not testing the pen to failure. If a correctly handled pen repeatedly struggles to restart, note the circumstances and ask for advice.
Keep a helpful record if you need support
When describing a difficulty, include the model, nib marking, ink and paper. Mention whether the pen is newly filled or has been sitting unused. Explain whether it fails on the first stroke, after several lines or only in one direction.
A short video of normal writing can sometimes communicate more than the word scratchy, provided it shows the nib angle without requiring you to press harder. A photograph of a feathered page can also help distinguish paper behaviour from an ink-supply issue.
Keep any packaging and instructions while learning the pen. They make it easier to identify the supplied cartridge or converter and avoid guesses about the version. A clear description gives the next conversation a useful starting point, whether the answer is a simple adjustment to your routine or an assessment of the instrument.
Your first-week checklist
On the first day, learn the mechanism and write a short page. Over the next few days, notice whether the nib width and paper suit your handwriting. Keep the ink constant while you become comfortable with the pen.
At the end of the week, review what you actually used it for. Did you prefer lists, longer passages or personal notes? That observation can guide a future notebook or ink purchase far better than buying everything at once.
If something remains uncomfortable, describe it specifically. “The grip slips after ten minutes” or “the line is too wide for my notebook” gives us a useful starting point. There is usually a more helpful answer than assuming you need a more expensive pen.
Frequently asked questions
Do I need to press hard to start a fountain pen?
No. A properly supplied fountain pen should write with light pressure. If it does not, check filling, orientation and the model's instructions before applying more force.
Can I use it if I am left-handed?
Yes. Hand position, nib choice, drying time and paper all influence comfort. Our left-handed writing guide explains how to build a suitable setup.
Should I buy a cartridge or converter first?
A compatible cartridge is convenient for learning the pen. A suitable converter opens up bottled ink choices. Choose around convenience and the system your pen supports.
Why buy your first fountain pen from Makoba?
We can help you compare the pen with the ink supply and notebook it needs. Tell us how large you write, the paper you use and your preferred budget. A good first setup should be understandable, comfortable and enjoyable enough that you want to open it again tomorrow.


Leave a comment